Install the appliance on NSX-T 3.x
Deep Security Virtual Appliance will reach end of extended support (EOL) on 31-Dec-2027 or VMware's end of support date for NSX-4.X, whichever comes first.
You must now install the appliance on NSX-T 3.x.
Follow these instructions:
- Begin the service deployment
- Configure and start the service deployment
- Monitor and verify the deployment
- Monitor and verify the deployment
- Repeat all steps for each cluster
Begin the service deployment
- In NSX-T Manager, click System, and then on the left, select Service Deployments.
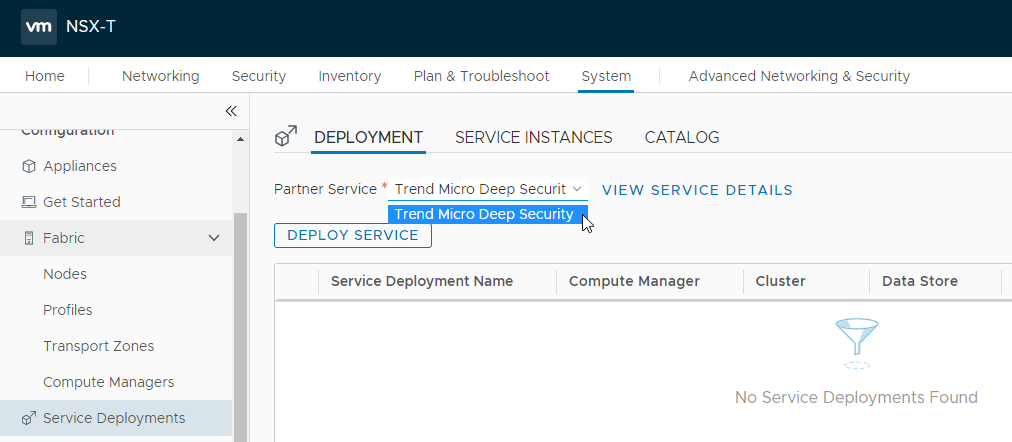
- From the Partner Service list, select Trend Micro Deep Security. This Trend Micro Deep Security service was registered when you added your vCenter in Deep Security Manager previously.
- Click DEPLOY SERVICE.
A blue panel appears.
- Fill out the blue panel, as described in Configure and start the service deployment.
Configure and start the service deployment
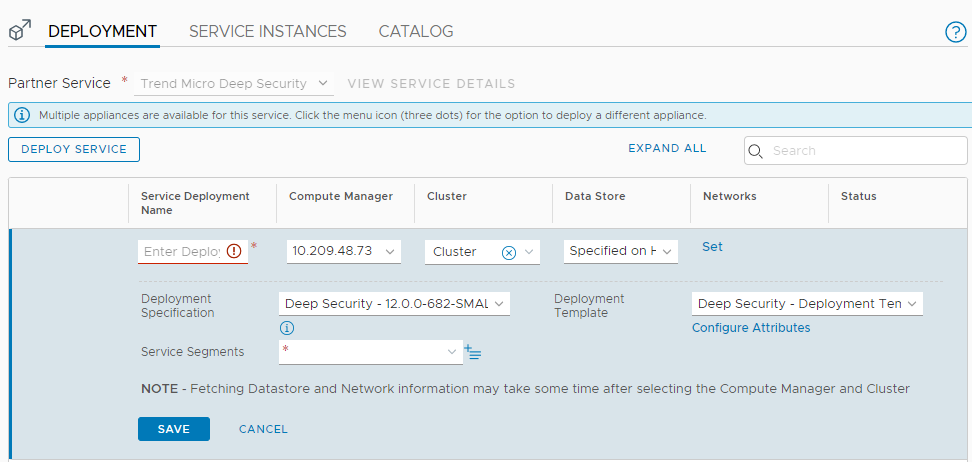
Fill out the service deployment fields as described below and then click SAVE to begin the deployment.
Set the Service Deployment Name
In the Service Deployment Name field, enter a name. If you have multiple clusters, consider using a name that includes the name of the cluster of which you are deploying. The cluster is listed under the Cluster heading on the same page. Example: dsva-vc73-cluster.
Set the Compute Manager
From the Compute Manager drop-down list, select the vCenter you added previously. In our example, the vCenter is 10.209.48.73.
Set the Cluster
From the Cluster drop-down list, select a cluster you configured previously. The Trend Micro Deep Security service will be installed to all the ESXi servers in this cluster. If you have multiple clusters, pick one now. You can come back later to pick another cluster.
Set the Data Store
From the Data Store drop-down list, select the option that is appropriate for your environment. In our example, we selected Specified on Host.
Set the Networks
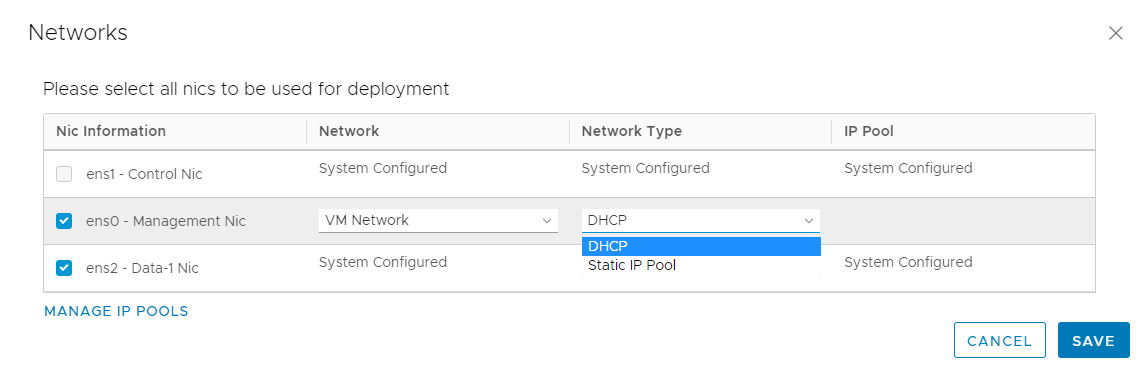
Under Networks:
- Click Set or Edit Details, whichever is available.
- Select the ens0 - Management Nic check box.
- Choose the Network and Network Type you want to use.
- Enable the ens2 - Data-1 NIC check box to obtain east-west security functionality.
- Click SAVE to save your network settings.
Set the Deployment Specification
From the Deployment Specification drop-down list:
- Select the Deep Security -<version>-SMALL - small, MEDIUM - medium, or LARGE - large option, depending on the size of your deployment. If you're not sure of the size of your deployment, review the information in Deep Security Virtual Appliance sizing. In our example, we selected Deep Security - 12.0.0-682-SMALL - Small.
- If you previously
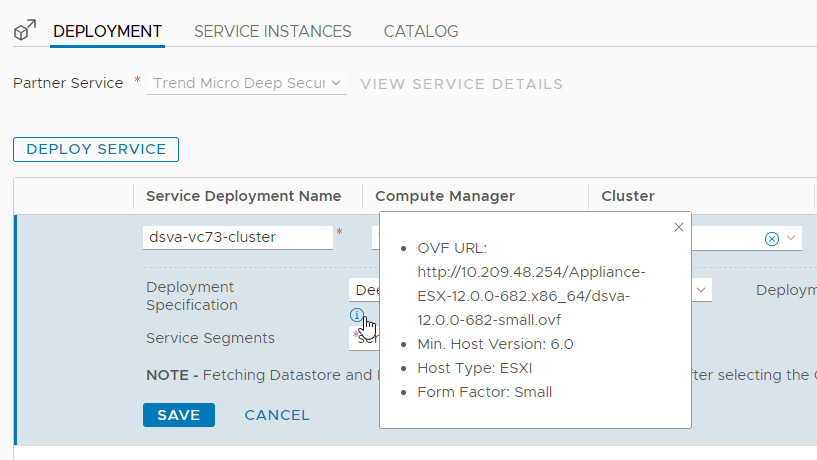
- Click
 to view the OVF URL from which NSX will download the appliance OVF.
 If you specified a different URL for the OVF, then that URL will be used instead.
Set the Service Segment
From the Service Segment drop-down list, select a service segment that is configured to use your overlay transport zone.
If you do not yet have a service segment, create one as follows:
- Click Action.
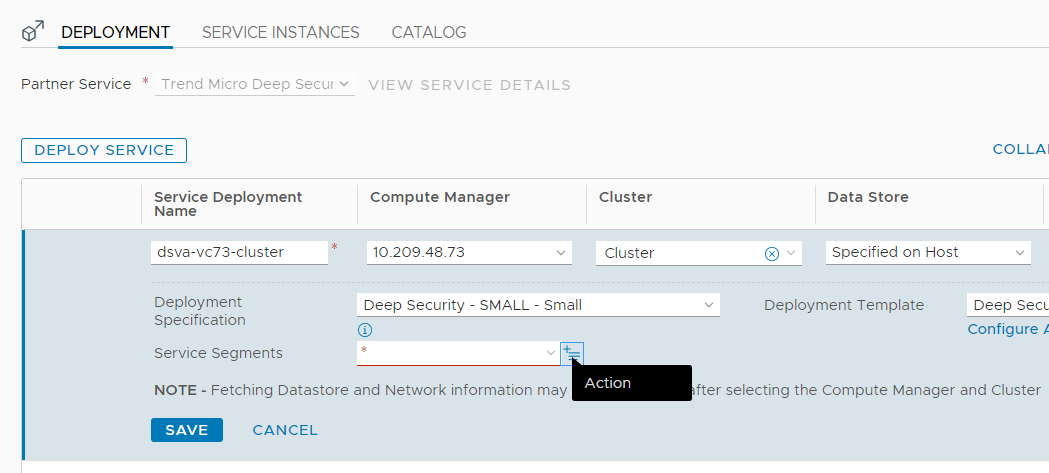
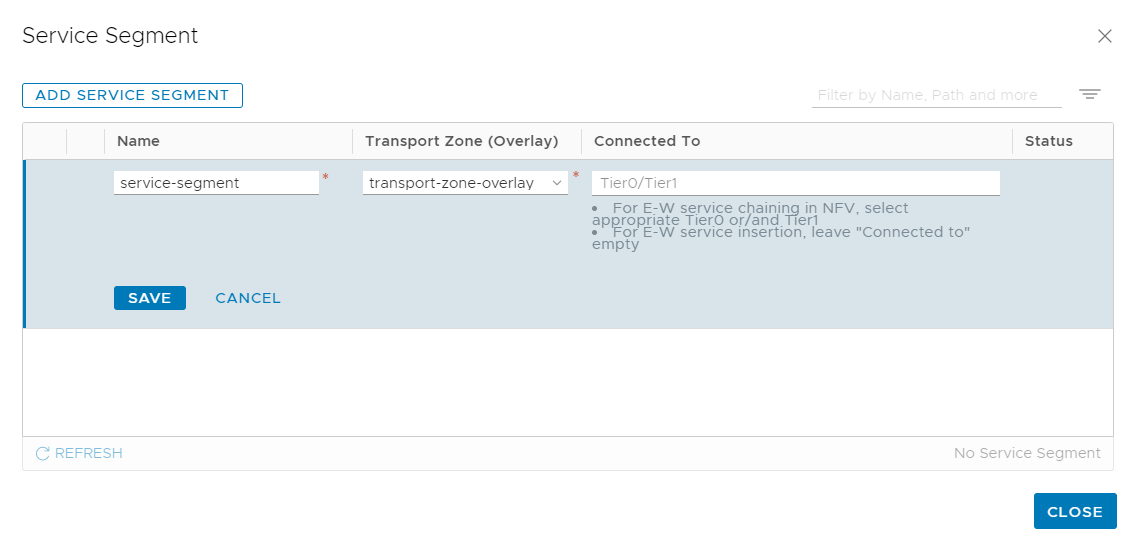
The Service Segment dialog box appears.
- Click ADD SERVICE SEGMENT.
- Under Name, enter a name such as service-segment.
- Under Transport Zone (Overlay), select transport-zone-overlay or whichever overlay transport zone you're using.
- Leave Connected To empty.
- Click SAVE and then CLOSE. A service segment is created.
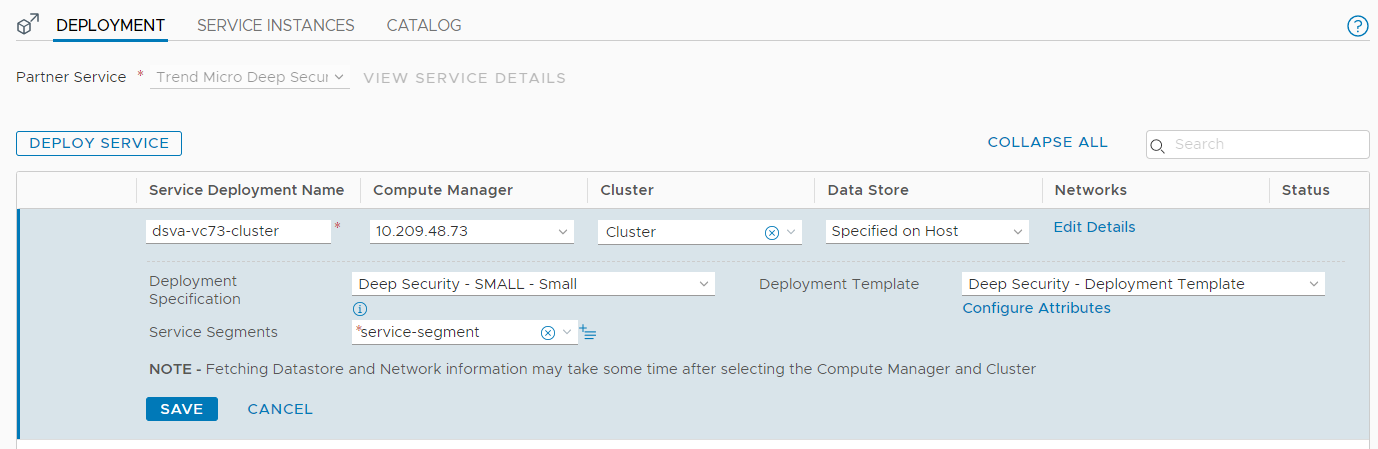
- From the Service Segments drop-down list, select the service segment you just created.
Set the Deployment template
- From the Deployment Template drop-down list, select Deep Security - Deployment Template.
- (Optional) If you would like to configure the CPU usage of the appliance in DPDK mode click Configure Attributes and modify the dpdkMode field. For details on DPDK and how to it works with the appliance, see Configure DPDK mode.
Your service deployment details should look similar to the following:
Monitor and verify the deployment
After starting the deployment, you can monitor it in NSX-T 3.x and vSphere Client, and then verify it in Deep Security Manager.
Monitor the deployment in NSX-T 3.x
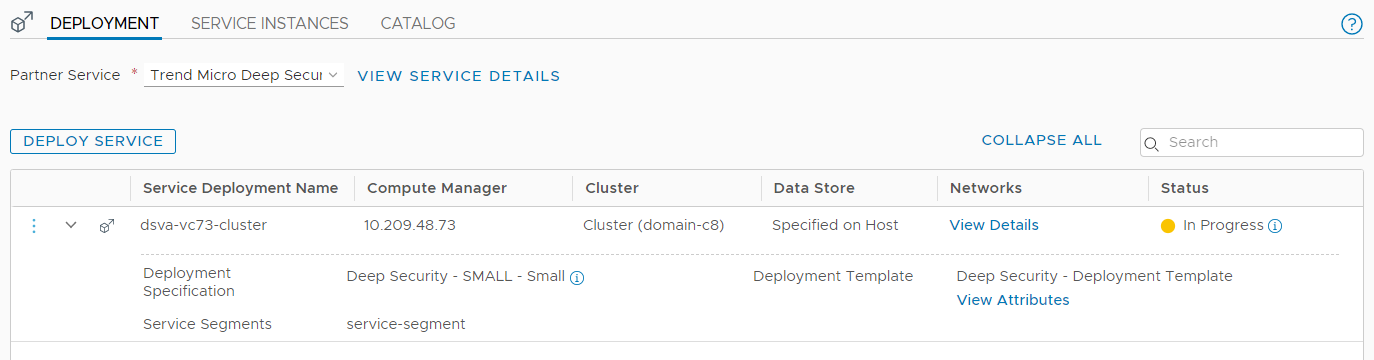
The Status column in NSX-T Manager indicates In Progress.
When the deployment is finished, the Status changes to Up.
If you have multiple ESXi servers in the assigned cluster, then a Trend Micro Deep Security service is deployed onto each ESXi server. The services will be labeled as follows to differentiate them.
- Trend Micro_Deep Security - SMALL (1) (for the first ESXi server)
- Trend Micro_Deep Security - SMALL (2) (for the second ESXi server)
- ... and so on.
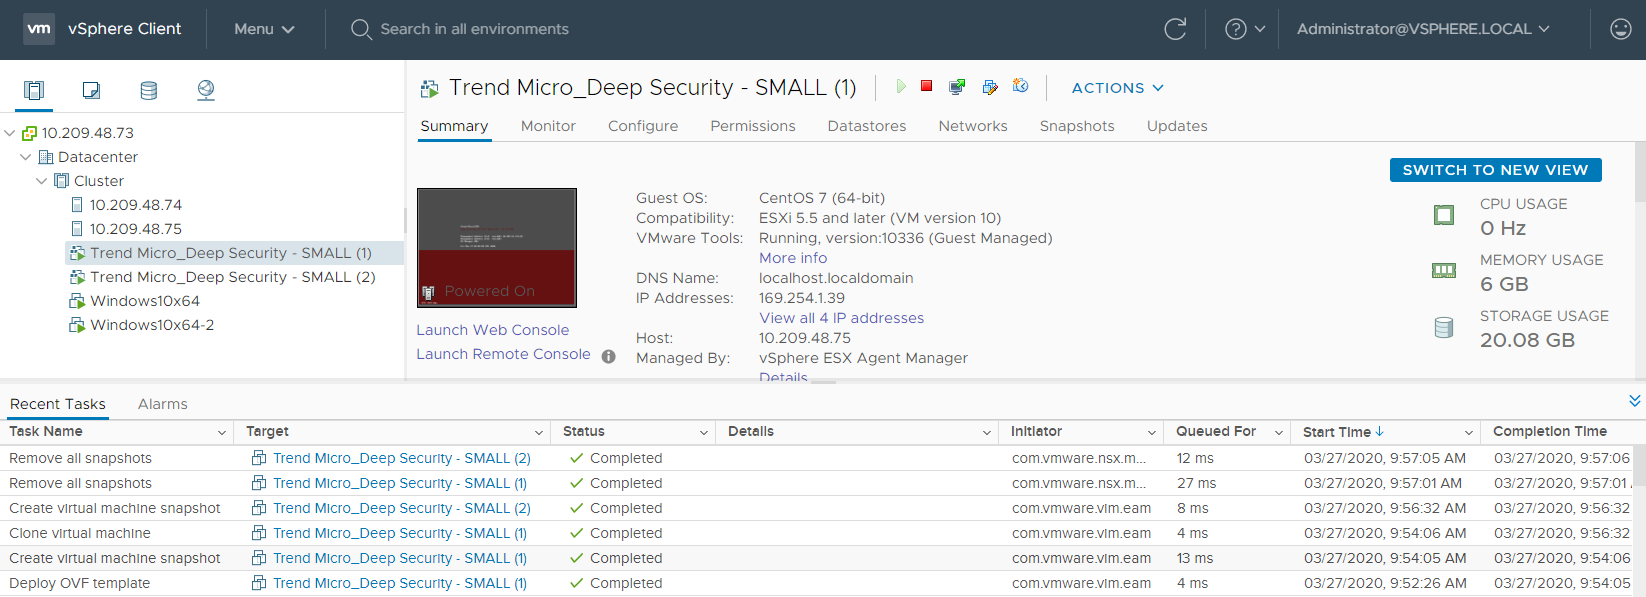
Monitor the deployment in vSphere Client
You can check the status of the deployment by accessing vCenter through the vSphere Client. The vSphere Client shows the progress in more detail. Wait until the Status changes to Complete.
In the image below, you see two Trend Micro Deep Security services listed on the left. Two services were deployed because there were two ESXi servers in the cluster.
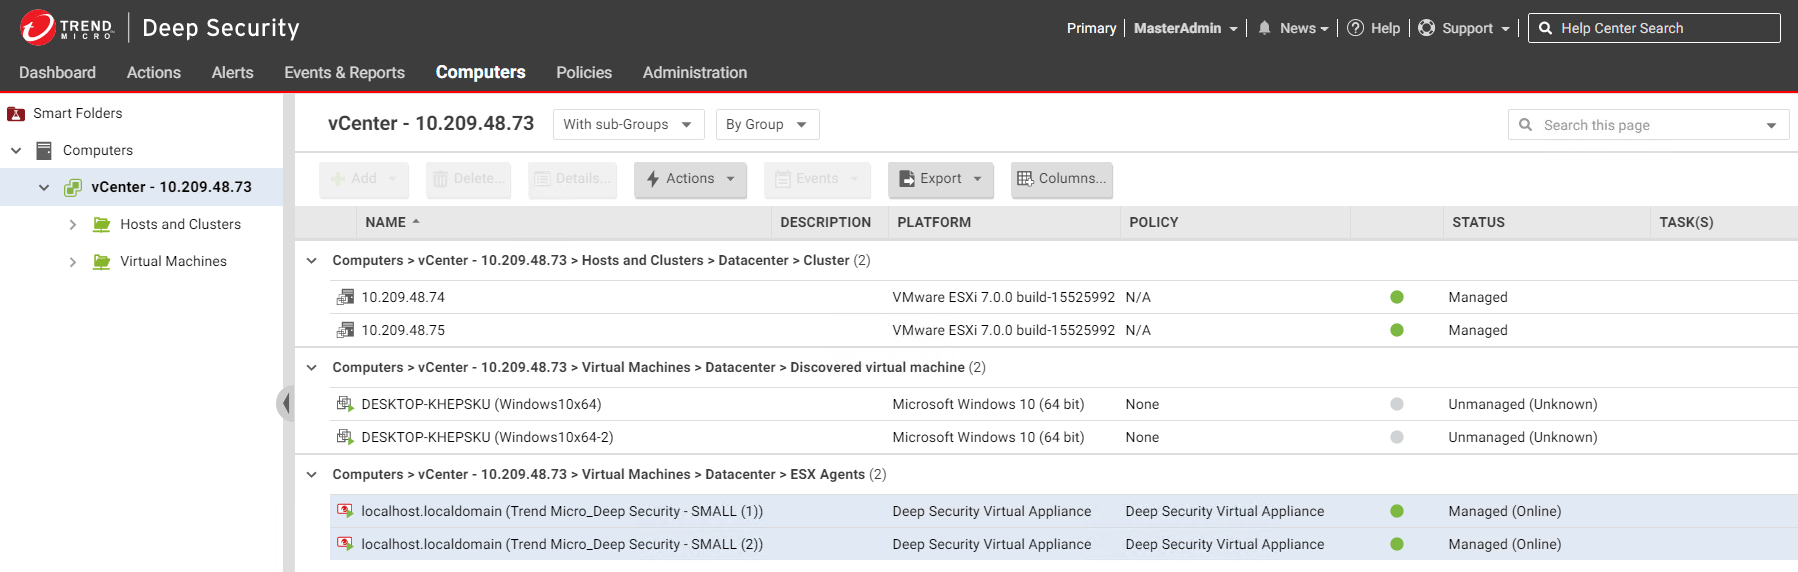
Verify the deployment in Deep Security Manager
You can verify the deployment in Deep Security Manager by clicking Computers at the top and then on the left, expanding the vCenter where the Trend Micro Deep Security service was deployed.
Trend Micro_Deep Security (1) appears under Virtual Machines > Datacenter > ESX Agents with a Platform of Deep Security Virtual Appliance. You see one virtual appliance per ESXi server in your cluster.
Although your VMs appear in Deep Security Manager, they are not yet protected.
Repeat all steps for each cluster
Repeat all the steps in Install the appliance on NSX-T 3.x for each cluster.
You have now installed the appliance on NSX-T 3.x.