Deep Security Manager 10 has reached end of support. Use the version selector (above) to see more recent versions of the Help Center.
Protect Microsoft Azure Virtual Machines with Deep Security Manager
To use Deep Security Manager to protect Microsoft Azure Virtual Machines (VM), you must:
- Add Virtual Machines from a Microsoft Azure cloud account to Deep Security.
- Create a Policy.
- Configure the communication direction.
- Deploy Deep Security Agents.
Add Virtual Machines from a Microsoft Azure cloud account to Deep Security
The procedure for adding your virtual machines to Deep Security depends on which version of Deep Security you are running. To figure out which procedure you should use, go to the Computers page in your Deep Security Manager. If you see an Add button, follow the instructions for recent versions. If you see a New button, follow the instructions for earlier versions.
If you are running a recent version of Deep Security (including Deep Security as a Service)
If you have already added Azure VMs that are part of this Azure account, they will be moved in the tree structure to appear under this account.
- On the Computers page, click Add > Add Azure Account.
- Enter the account credentials used to log into the Azure portal and click Sign in.
The account must be the owner of the Azure subscription and must have the Global Admin role in your Azure Active Directory. These privileges are required so that Deep Security can automate the provisioning of a Service Principal object in your Azure Active Directory. Deep Security uses that Service Principal object to authenticate itself to your Azure subscription so that it can invoke the necessary Azure APIs to synchronize your Azure VMs in the Deep Security Manager console. For instructions on creating a user with global administrator rights, see Microsoft's Add or delete users using Azure Active Directory article.
- Click Accept on the Deep Security Connector permissions page.
- Select the Azure Active Directory and Subscription Name and click Next.
- Review the summary information and click Finish.
The Azure virtual machines now appear in the Deep Security Manager under their own branch on the Computers page.
If you are running an earlier version of Deep Security
To import cloud resources into Deep Security Manager, Deep Security users must first have an account with which to access the cloud provider service resources. For each Deep Security user who will import a cloud account into the Deep Security Manager, Trend Micro recommends creating a dedicated account for that Deep Security Manager to access the cloud resources. That is, users should have one account to access and control the virtual machines themselves, and a separate account for their Deep Security Manager to connect to those resources.
If you have already added Azure VMs that are part of this Azure account, they will be moved in the tree structure to appear under this account.
-
On the Computers page, click New > Add Cloud Account.
The cloud account wizard will start.
- Select Azure from the Provider Type list.
- Enter your Subscription ID, Key Pair and Key Pair Password, and click Next.
The Azure virtual machines now appear in the Deep Security Manager under their own branch on the Computers page.
Create a Policy
After you have added Microsoft Azure virtual machines to Deep Security, your next step is to customize the default policies to suit your particular requirements before you deploy Deep Security Agents to protect your VM instances.
You have two options for creating a policy:
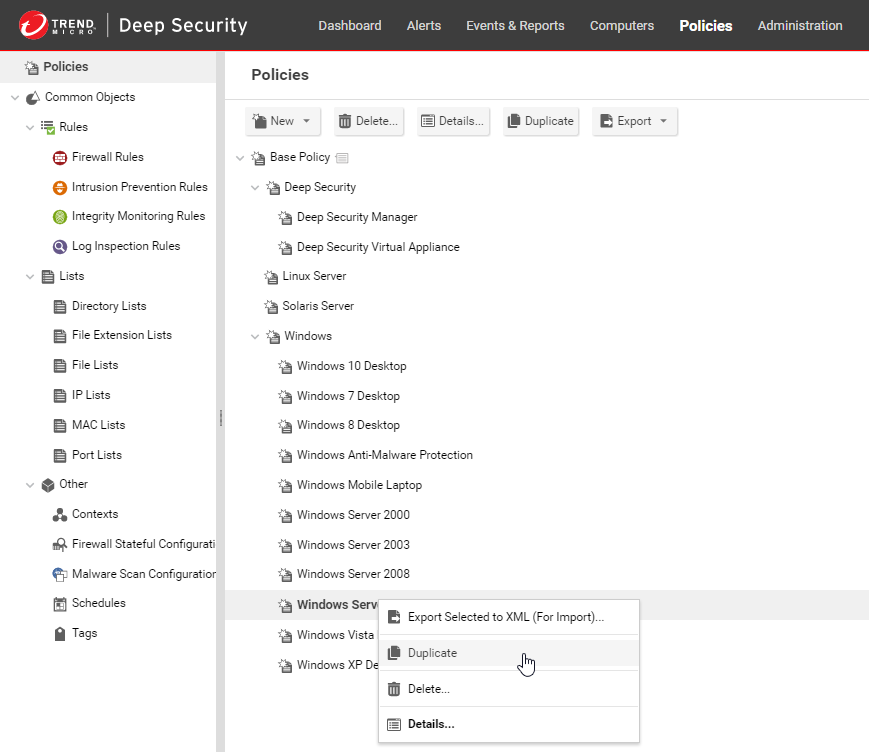
- You can make a duplicate copy of one of the server policies that comes with Deep Security and modify it as required.
- You can build your own policy using the Base Policy as your starting point.
It is recommended that you make a duplicate of the policy that most closely relates to the resources you will be protecting (for example, a Windows 2008 or Linux server) and modify it. For example, you can select the Windows Server 2012 policy in Deep Security Manager, create a duplicate of the policy, and assign the new policy a unique name. You can then open the new policy and customize the security module settings as required for your environment. 
Configure the communication direction
You have to configure how Deep Security Manager will communicate with Deep Security Agents before you deploy them. There are three options for communication between Deep Security Manager and Deep Security Agents: Bidirectional, Manager Initiated, and Agent Initiated. If Deep Security Manager is installed either on premises or on a different cloud service from the Deep Security Agent, we recommend that you select Agent-Initiated communication as the communication direction.
- Right-click the policy you want to configure in the Policies tab of Deep Security Manager and select Details.
- Go to Settings > Computer > Communication Direction and select an option from the list.
If the Deep Security Manager and Deep Security Agent are on a separate cloud service, select Agent/Appliance initiated. If they are on the same cloud service, select Bidirectional.
- Click Save to apply the changes.
For more information on agent-initiated communication, see Use agent-initiated communication with cloud accounts.
Deploy Deep Security Agents
The final step in protecting your Microsoft Azure Virtual Machines is to deploy Deep Security Agents to protect your Azure virtual machines. You can do this several ways. See Install the agent on a Microsoft Azure VM.