Deep Security 12 FR has reached end of support. Use the version selector (above) to see more recent versions of the Help Center.
Upgrade the NSX license for more Deep Security features
If you want to use the Deep Security Firewall, Intrusion Prevention, or Web Reputation features with Deep Security Virtual Appliance, you'll need to use a license that supports VMware's network functionality. Network functionality is supported with the following license types:
- NSX Advanced
- NSX Enterprise
- NSX Data Center Advanced
- NSX Data Center Enterprise Plus
- NSX Data Center for Remote Office Branch Office
If you're using another license type, you'll have to upgrade it. See:
As an alternative to upgrading your NSX license, you can deploy Deep Security Agents on your guest VMs to get the above-mentioned features. For details, see this table as well as Choose agentless vs. combined mode protection.
If you're using NSX-T 2.5.x, VMware's network functionality and the Deep Security features that rely on it are not supported. You must upgrade to NSX-T 3.x to get these features. For details, see Upgrade from NSX-T 2.5.x to NSX-T 3.x.
Upgrade your NSX-T 3.x license
- Log in to NSX-T Manager.
- Click System > Licenses.
- Click Add, enter the license key, and click Add.
- Log out and log back in to NSX-T Manager. The new license is applied.
You can now use the Deep Security features that rely on VMware's network functionality, namely, the Firewall, Intrusion Prevention, and Web Reputation features. You can continue to use the Anti-Malware and Integrity Monitoring features, which were available to you previously.
Upgrade your NSX-V license
- Step 1: Upgrade your NSX license
- Step 2: Remove Deep Security from NSX completely
- Step 3: Redeploy the Deep Security Virtual Appliance
Step 1: Upgrade your NSX license
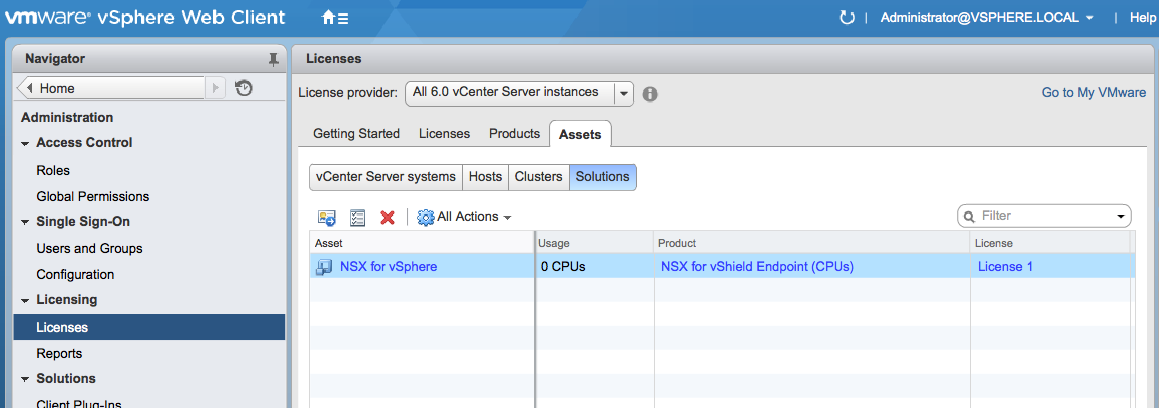
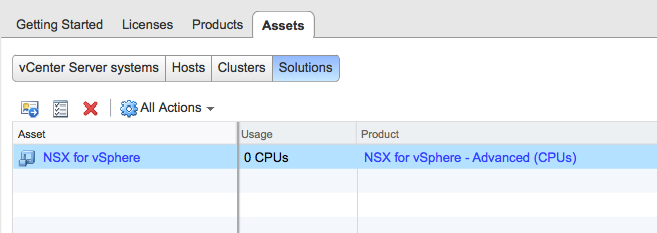
- In your vSphere Web Client, go to Home > Administration > Licenses.
- In the main pane, click Assets, and then click the Solutions button.
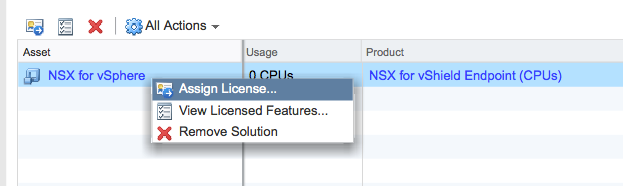
- Right-click NSX for vSphere and select Assign License.
- Click the green + on the left to create a new license.
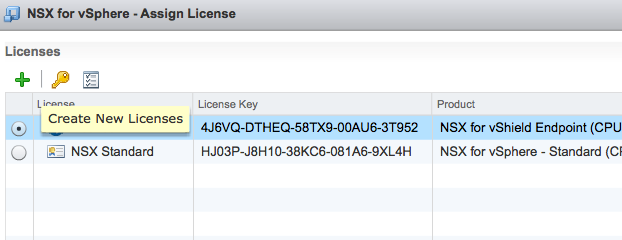
A wizard appears, guiding you through the process of adding a license key.
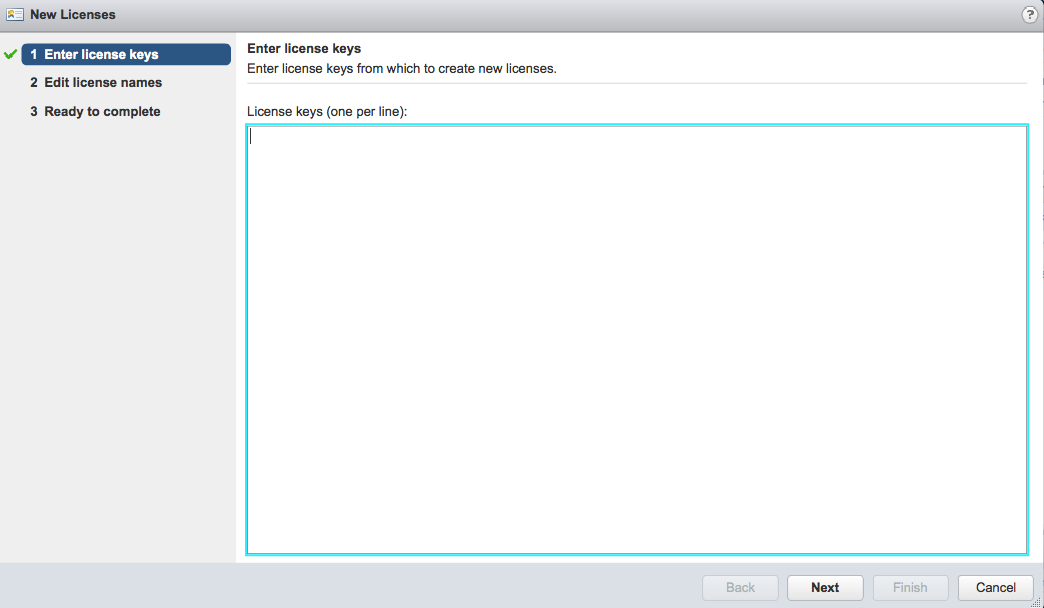
- In the wizard, enter the NSX Advanced, NSX Enterprise, NSX Data Center Professional, NSX Data Center Advanced, NSX Data Center Enterprise Plus, or NSX Data Center fore Remote Branch Office license key and a license name. At the end of the wizard, click Finished.
The new license appears in the list on the Assign License page.
- Select the new license and click OK.
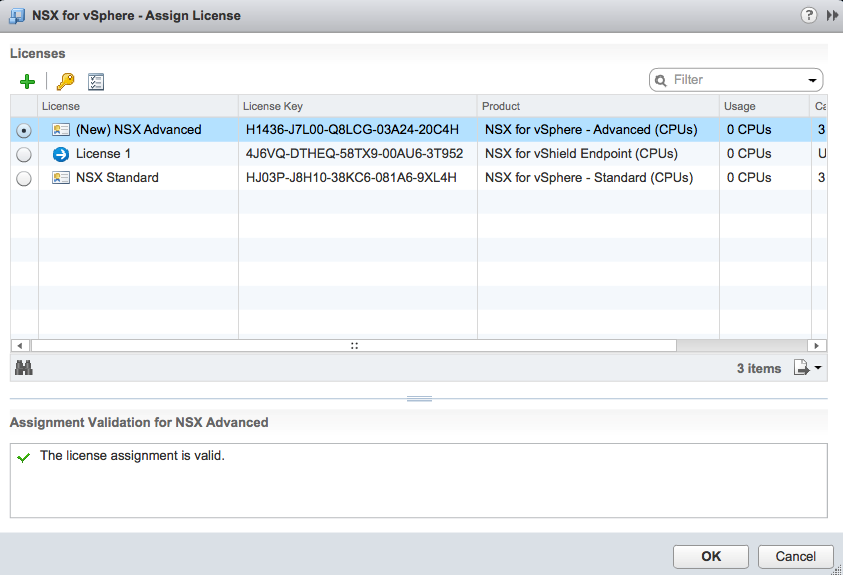
The new NSX license is now in use.
Step 2: Remove Deep Security from NSX completely
In order for the new license to take effect, you'll need to remove Deep Security entirely from NSX. To remove the Deep Security from NSX, see Uninstall Deep Security from your NSX environment.
Step 3: Redeploy the Deep Security Virtual Appliance
After completely removing Deep Security from NSX, you'll need to redeploy the Deep Security Virtual Appliance. To redeploy, follow all the steps in Deploy the appliance (NSX-V).
You can now use the Firewall, Intrusion Prevention, and Web Reputation features, and you can continue to use the Anti-Malware and Integrity Monitoring features, which were available to you previously.