Configure east-west security
Configuring east-west security is necessary to enable the networking functionality required for the Integrity Monitoring, Intrusion Prevention, Firewall, and Web Reputation features.
Follow the steps below to configure east-west security:
- Add a service profile
- Add a service chain
- Add a Network Introspection policy
- Connect VMs to the logical switch
Add a service profile
- In NSX-T Manager, click Security at the top, toggle to POLICY, and then on the left, find Settings and click Network Introspection Settings.
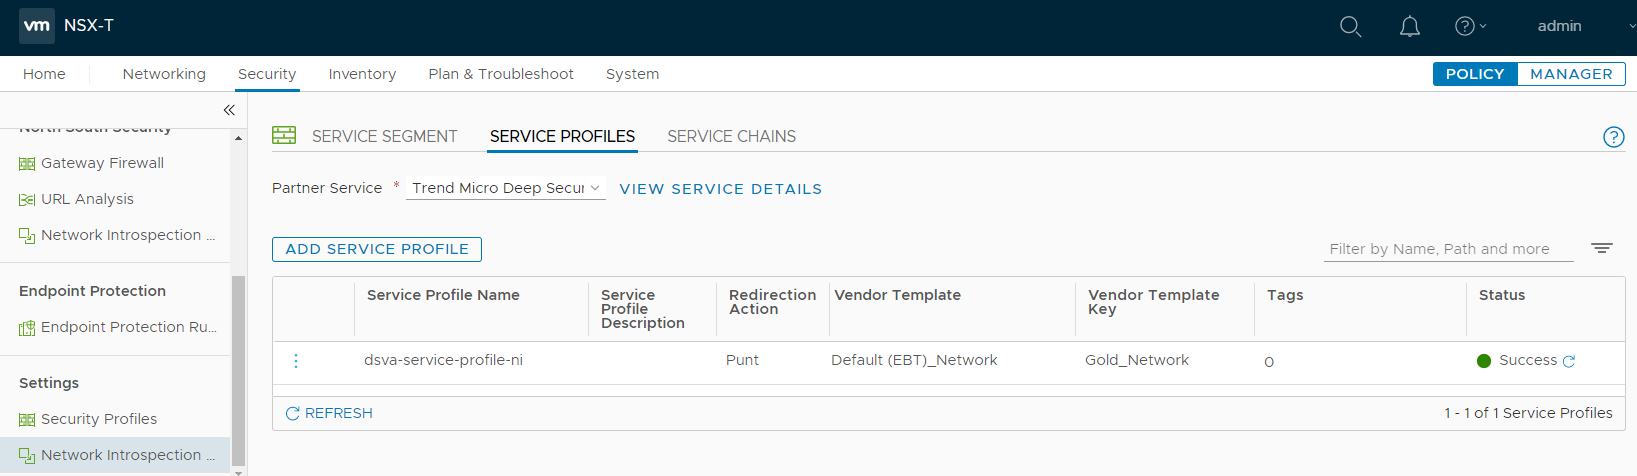
- In the main pane, click SERVICE PROFILES.
- From the Partner Service drop-down list, select Trend Micro Deep Security if it is not already selected.
- Click ADD SERVICE PROFILE and fill out the fields as follows:
- For the Service Profile Name, specify a name. Example: dsva-service-profile-ni.
- For the Service Profile Description, enter a description. Example: Deep Security Service Profile for Network Introspection.
- For the Vendor Template, select Default (EBT)_Network. This template was loaded at the same time as the Trend Micro Deep Security service.
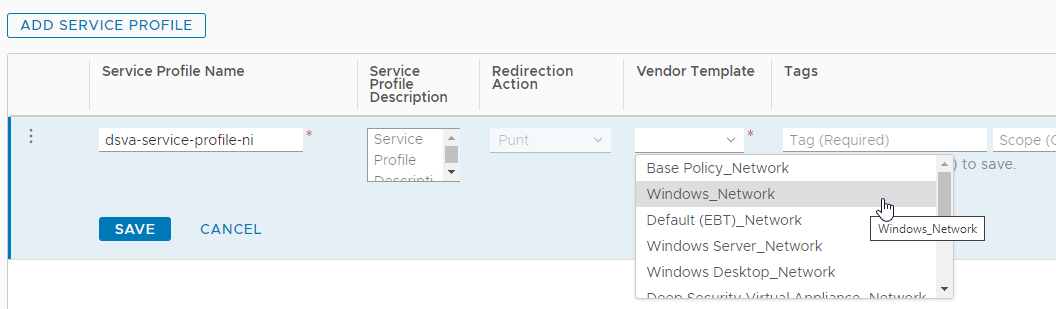
- The ADD SERVICE PROFILE page should now look similar to the following:
- Click SAVE.
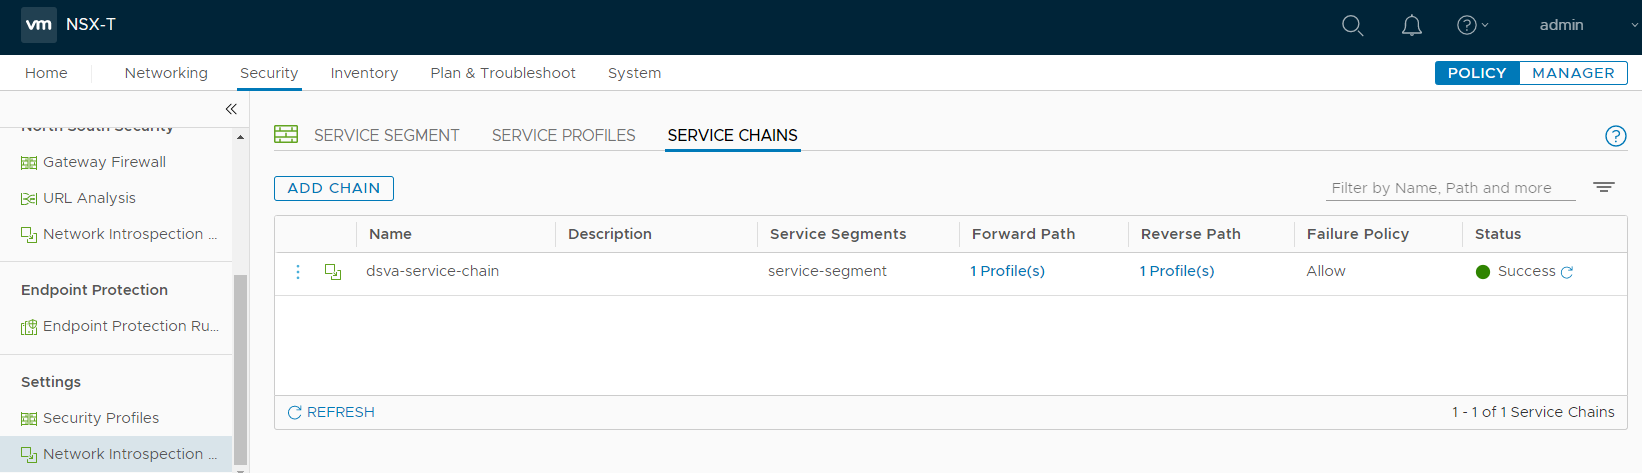
Add a service chain
- On the main pane, click the SERVICE CHAINS tab, and click ADD CHAIN. Fill out the fields as described in the following steps.
- For the Name, specify a name. Example: dsva-service-chain.
- For the Service Segments, select the service segment created previously. Example: service-segment.
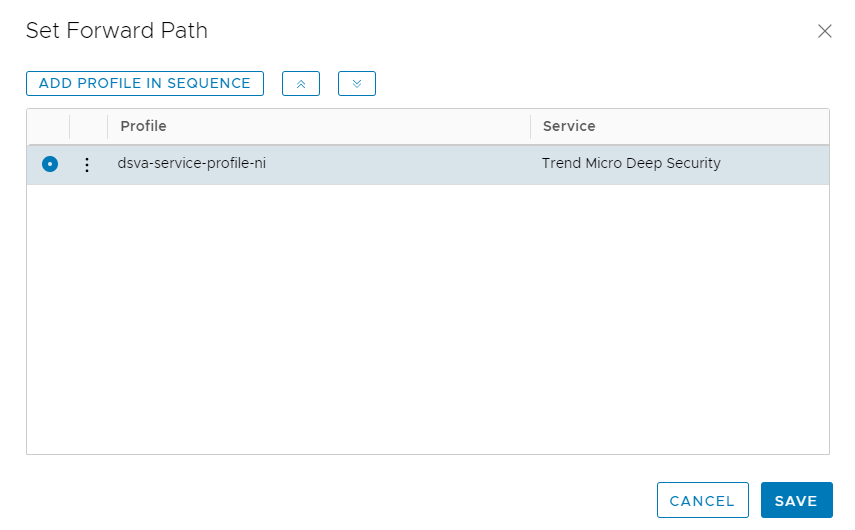
- For the Forward Path:
- Click Set Forward Path to open the dialog box.
- Click ADD PROFILE IN SEQUENCE and add the service profile created previously. In the example, we selected dsva-service-profile-ni.
- Click ADD.
- Click SAVE.
You're now back on the main SERVICE CHAINS page. Continue with the SERVICE CHAIN configuration below.
- For the Reverse Path, keep the Inverse Forward Path check box selected.
- For the Failure Policy, select Allow.
The service chain should now look like the following:
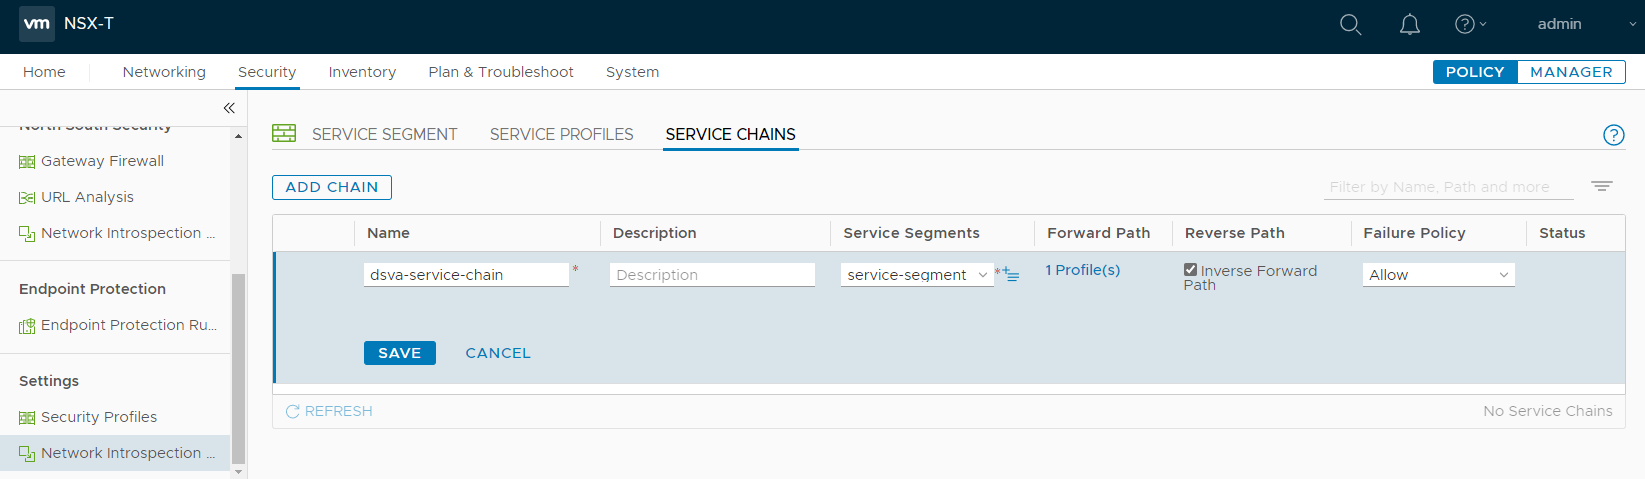
- Click SAVE.
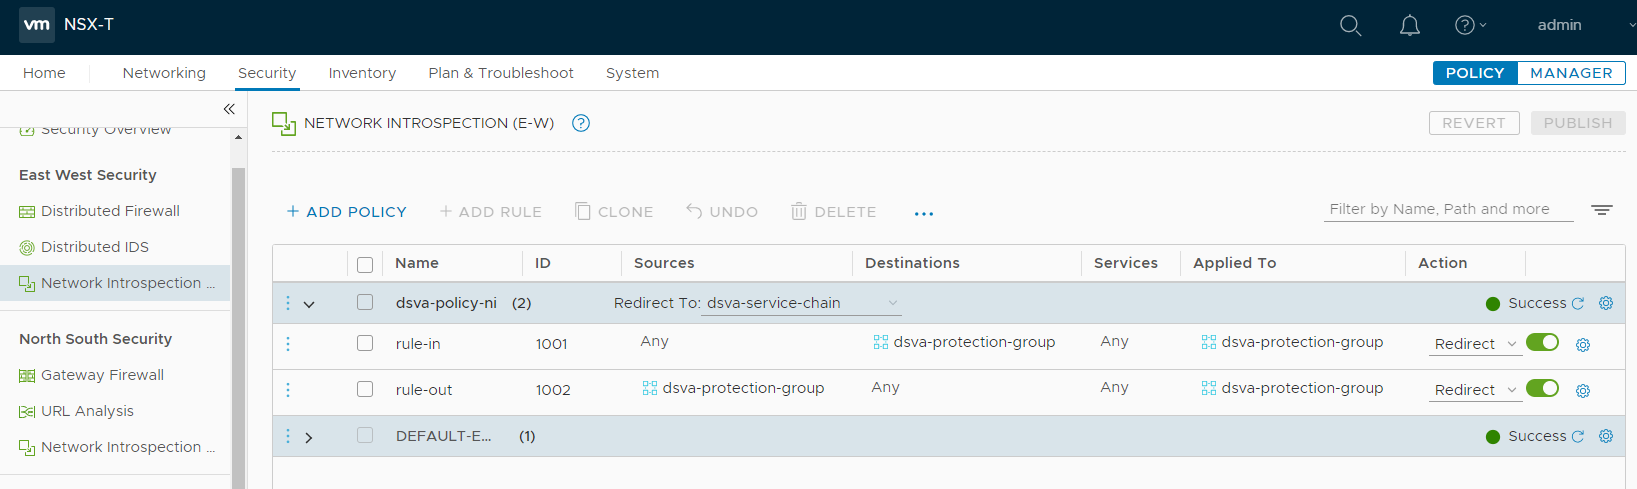
Add a Network Introspection policy
- Click Security at the top, toggle to POLICY, and then on the left, find East West Security and click Network Introspection (E-W).
- In the main pane, click + ADD POLICY.
- In the Name column, click within the New Policy cell and change the name. For example, use dsva-policy-ni. For Redirect To, select the service chain. In this example, we used dsva-service-chain.
- Select the check box next to dsva-policy-ni and click + ADD RULE. A rule appears under dsva-policy-ni. Click + ADD RULE again because we need 2 rules.
- Configure the 1st rule for inbound traffic:
- For the Name, enter a name for the rule. Example: rule-in.
- For the Sources, keep Any.
- For the Destinations, select dsva-protection-group.
- For the Services, keep Any.
- For the Applied To, select dsva-protection-group.
- For the Action, select Redirect.
- Configure the 2nd rule for outbound traffic:
- For the Name, enter a name for the rule. Example: rule-out.
- For the Sources, select dsva-protection-group.
- For the Destinations, keep Any.
- For the Services, keep Any.
- For the Applied To, select dsva-protection-group.
- For the Action, select Redirect.
There is now a mapping between the VMs in the dsva-protection-group and the Default (EBT)_Network template specified in the dsva-service-chain.
The policy should now look similar to the following:
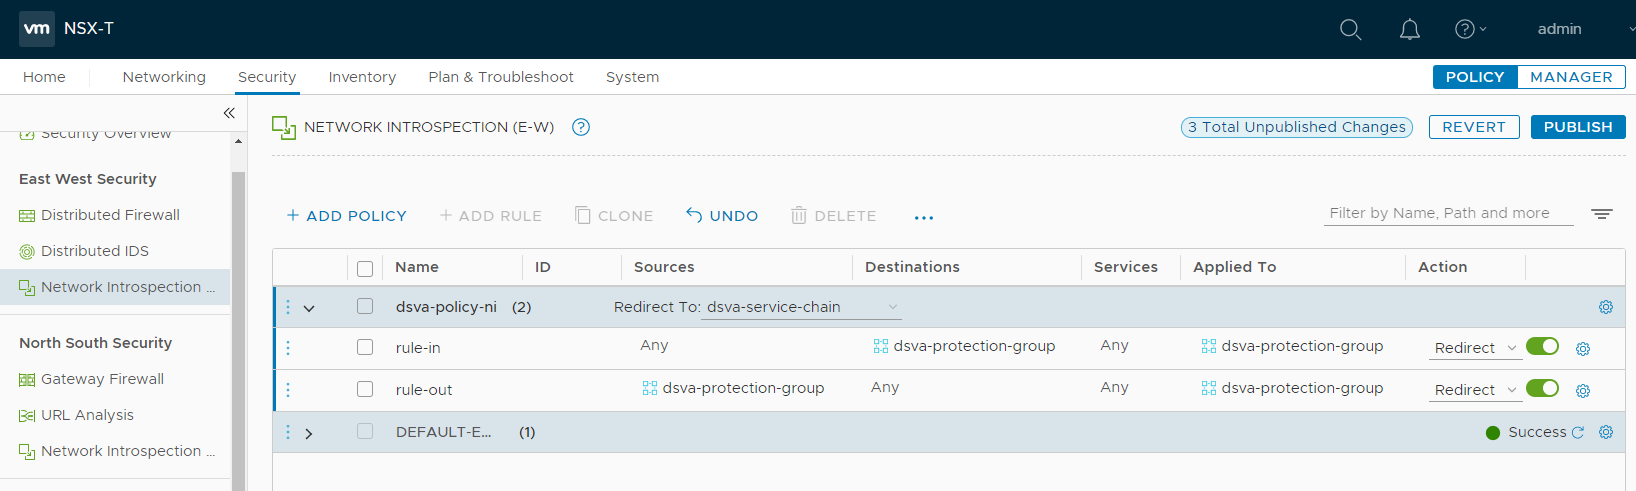
- Click PUBLISH to finish the policy and rule creation.
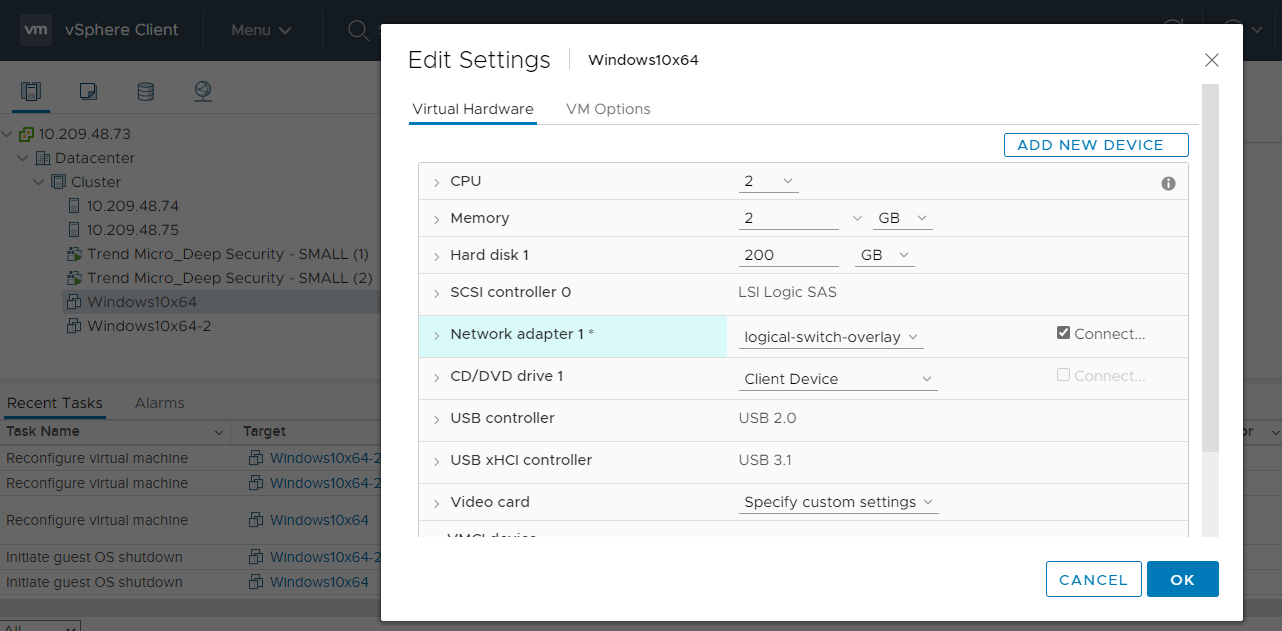
Connect VMs to the logical switch
In order for the VMs in your group to be protected by east-west security in NSX-T, those VMs connected to the logical switch created in an earlier step.
In the example, we connected the Network adapter 1 to logical-switch-overlay. You can check that your VMs are connected to this switch by accessing vCenter through vSphere Client.
You have now configured east-west security in NSX-T.