Deep Security 11.3 has reached end of support. Use the version selector (above) to see more recent versions of the Help Center.
Set up integrity monitoring
The Integrity Monitoring protection module detects changes to files and critical system areas like the Windows registry that could indicate suspicious activity. It does this by comparing current conditions to a baseline reading it has previously recorded. Deep Security ships with predefined Integrity Monitoring rules and new Integrity Monitoring rules are provided in security updates.
How to enable Integrity Monitoring
You can enable Integrity Monitoring in policies or at the computer level. To do so, you will need to:
- Turn on Integrity Monitoring.
- Run a Recommendation scan.
- Apply the Integrity Monitoring rules.
- Build a baseline for the computer.
- Periodically scan for changes.
- Test Integrity Monitoring.
Once you've enabled integrity monitoring, you can also learn more about
- When Integrity Monitoring scans are performed
- Integrity Monitoring scan performance settings
- Integrity Monitoring event tagging
Following is a typical procedure for enabling Integrity Monitoring:
Turn on Integrity Monitoring
You can enable Integrity Monitoring in the settings for a computer or in policies. To do this, open the Policy or Computer editor and go to Integrity Monitoring > General. Set the Configuration to "On" or "Inherited (On)" and then click Save.

Run a Recommendation scan
Run a Recommendation scan on the computer to get recommendations about which rules would be appropriate. To do this, open the Computer editor and go to Integrity Monitoring > General. In the Recommendations section, click Scan for Recommendations. You can optionally specify that Deep Security should implement the rule recommendations that it finds.
Recommended Integrity Monitoring rules may result in too many monitored entities and attributes. The best practice is to decide what is critical and should be monitored, then create custom rules or tune the predefined rules. Pay extra attention to rules that monitor frequently-changed properties such as process IDs and source port numbers because they can be noisy and may need some tuning.
If you have enabled real-time integrity monitoring scans and find that some recommended rules produce too many events because they are monitoring directories that change frequently, you can disable real-time scanning for those rules. Go to Policies > Common Objects > Rules > Integrity Monitoring Rules and double-click the rule. On the Options tab, clear the Allow Real Time Monitoring checkbox.
Apply the Integrity Monitoring rules
As described above, when you run a Recommendation scan, you can have Deep Security implement the recommended rules automatically. You can also manually assign rules.
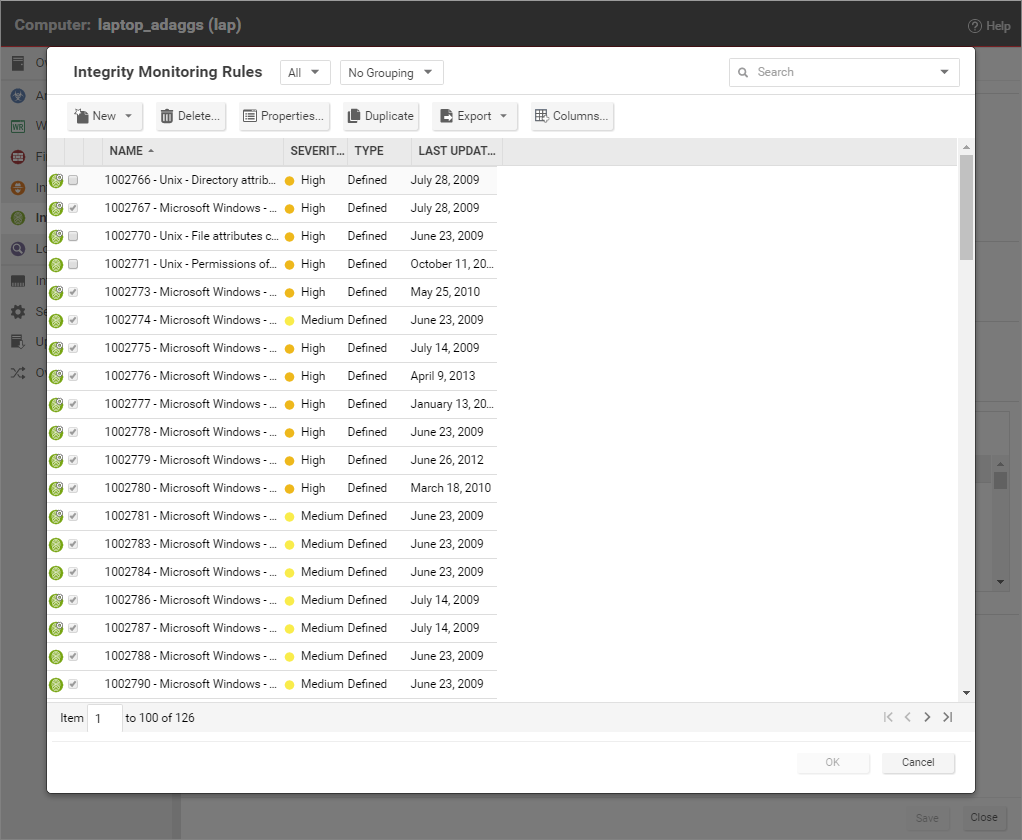
In the Computer or Policy editor, go to Integrity Monitoring > General. The "Assigned Integrity Monitoring Rules" section displays the rules that are in effect for this policy or computer. To add or remove Integrity Monitoring Rules, click Assign/Unassign. This will display a window showing all available Integrity Monitoring Rules, from which you can select or deselect rules.
Some Integrity Monitoring rules written by Trend Micro require local configuration to function properly. If you assign one of these rules to your computers or one of these rules gets assigned automatically, an alert will be raised to notify you that configuration is required.
You can edit an Integrity Monitoring rule locally so that the changes apply only to the computer or policy being edited, or globally so that the changes apply to all other policies or computers that are using the rule. To edit a rule locally, right-click it and click Properties. To edit a rule globally, right-click it and click Properties (Global).
You can also create custom rules to monitor for specific changes that concern your organization, such as a new user being added or new software being installed. For information on how to create a custom rule, see Integrity monitoring rules language.
Build a baseline for the computer
The baseline is the original secure state that an Integrity Scan's results will be compared against. To create a new baseline for Integrity Scans on a computer, open the Computer editor, go to Integrity Monitoring > General and click Rebuild Baseline.
To view the current baseline data, click View Baseline.
Periodically scan for changes
Periodically scan for changes. To perform an on-demand scan, open the Computer editor, go to Integrity Monitoring > General and click Scan for Integrity. You can also create a scheduled task that performs scans on a regular basis.
Test Integrity Monitoring
Before continuing with further Integrity Monitoring configuration steps, test that the rules and baseline are working correctly:
- Ensure Integrity Monitoring is enabled.
- Go to the Computer or Policy editor
 You can change these settings for a policy or for a specific computer.
To change the settings for a policy, go to the Polices page and double-click the policy that you want to edit (or select the policy and click Details).
To change the settings for a computer, go to the Computers page and double-click the computer that you want to edit (or select the computer and click Details). > Integrity Monitoring > Assigned Integrity Monitoring Rules. Click Assign/Unassign.
You can change these settings for a policy or for a specific computer.
To change the settings for a policy, go to the Polices page and double-click the policy that you want to edit (or select the policy and click Details).
To change the settings for a computer, go to the Computers page and double-click the computer that you want to edit (or select the computer and click Details). > Integrity Monitoring > Assigned Integrity Monitoring Rules. Click Assign/Unassign. - If you're a Windows user:
- Search for 1002773 - Microsoft Windows - 'Hosts' file modified and enable the rule. This rule raises an alert when changes are made to C:\windows\system32\drivers\etc\hosts.
If you're a Linux user
- Search for 1003513 - Unix - File attributes changes in /etc location and enable the rule. This rule raises an alert when changes are made to the /etc/hosts file.
- Modify the above file and save the changes.
- Go to Computer editorTo open the Computer editor, go to the Computers page and double-click the computer that you want to edit (or select the computer and click Details). > Integrity Monitoring > General and click Scan for Integrity.
- Go to Events & Reports > Integrity Monitoring Events to verify the record of the modified host file. If the detection is recorded, the Integrity Monitoring module is working correctly.
When Integrity Monitoring scans are performed
There are three options for performing Integrity Monitoring scans:
- On-demand scans: You can initiate an on-demand integrity monitoring scan as needed by opening the Computer editorTo open the Computer editor, go to the Computers page and double-click the computer that you want to edit (or select the computer and click Details)., and going to Integrity Monitoring > General. In the Integrity Scan section, click Scan for Integrity.
- Scheduled scans: You can schedule integrity monitoring scans just like other Deep Security operations. Deep Security checks the entities that are being monitored and identifies and records an event for any changes since the last time it performed a scan. Multiple changes to monitored entities between scans will not be tracked; only the last change will be detected. To detect and report multiple changes to an entity's state, consider increasing the frequency of scheduled scans (for example, daily instead of weekly) or enable real-time scanning for entities that change frequently. To enable scheduled integrity monitoring scans, go to Administration > Scheduled Tasks > New. In the New Scheduled Task Wizard, select Scan Computers for Integrity Changes and the frequency for the scheduled scan. Fill in the information requested by the New Scheduled Task Wizard with your desired specifications. For more information on scheduled tasks, see Schedule Deep Security to perform tasks.
- Real-time scans: You can enable real-time scanning. When this option is selected, Deep Security monitors entities for changes in real time and raises integrity monitoring events when it detects changes. Events are forwarded in real time via syslog to the SIEM or when the next heartbeat communication to the Deep Security Manager occurs. To enable real-time scans, go to the Computer or Policy EditorYou can change these settings for a policy or for a specific computer.
To change the settings for a policy, go to the Polices page and double-click the policy that you want to edit (or select the policy and click Details).
To change the settings for a computer, go to the Computers page and double-click the computer that you want to edit (or select the computer and click Details). > Integrity Monitoring > General and select Real Time. With Deep Security Agent 11.0 or higher on 64-bit Linux platforms and with Deep Security Agent 11.2 or higher on 64-bit Windows servers, the real-time scan results indicate the user and process that changed the file. For details about which platforms support this feature, see Supported features by platform.
Real-time monitoring of an entire disk for changes to any file would affect performance and result in too many integrity monitoring events. As a safeguard, if you choose to monitor the root drive (C:\) in real time, Deep Security will only monitor executable files and scripts. If you want to perform real-time monitoring of all files, specify a folder other than the root drive.
Integrity Monitoring scan performance settings
Changing the following settings may help to improve the performance of Integrity Monitoring scans:
Limit CPU usage
Integrity Monitoring uses local CPU resources during the system scan that leads to the creation of the initial baseline and during the system scan that compares a later state of the system to the previously created baseline. If you are finding that Integrity Monitoring is consuming more resources than you want it to, you can restrict the CPU usage to the following levels:
- High: Unlimited CPU usage
- Medium: The Integrity Monitoring process will not consume more than 50% of CPU resources
- Low: The Integrity Monitoring process will not consume more than 25% of CPU resources
To change the Integrity Monitoring CPU Usage Level setting, open the Computer or Policy editor![]() You can change these settings for a policy or for a specific computer.
To change the settings for a policy, go to the Polices page and double-click the policy that you want to edit (or select the policy and click Details).
To change the settings for a computer, go to the Computers page and double-click the computer that you want to edit (or select the computer and click Details). and go to Integrity Monitoring > Advanced.
You can change these settings for a policy or for a specific computer.
To change the settings for a policy, go to the Polices page and double-click the policy that you want to edit (or select the policy and click Details).
To change the settings for a computer, go to the Computers page and double-click the computer that you want to edit (or select the computer and click Details). and go to Integrity Monitoring > Advanced.
Change the content hash algorithm
You can select the hash algorithm(s) that will be used by the Integrity Monitoring module to store baseline information. You can select more than one algorithm, but this is not recommended because of the detrimental effect on performance.
You can change the content hash algorithm
Enable a VM Scan Cache configuration
Using scan caching for Integrity Monitoring improves the efficiency of scans by eliminating the unnecessary scanning of identical content across multiple VMs in large VMware deployments. To select which scan cache configuration is used by a virtual machine, open the Computer or Policy editor![]() You can change these settings for a policy or for a specific computer.
To change the settings for a policy, go to the Polices page and double-click the policy that you want to edit (or select the policy and click Details).
To change the settings for a computer, go to the Computers page and double-click the computer that you want to edit (or select the computer and click Details). and go to Integrity Monitoring > Advanced > VM Scan Cache.
You can change these settings for a policy or for a specific computer.
To change the settings for a policy, go to the Polices page and double-click the policy that you want to edit (or select the policy and click Details).
To change the settings for a computer, go to the Computers page and double-click the computer that you want to edit (or select the computer and click Details). and go to Integrity Monitoring > Advanced > VM Scan Cache.
For information on Integrity Monitoring scan cache configurations, see Virtual Appliance Scan Caching.
Integrity Monitoring event tagging
The events generated by the Integrity Monitoring module are displayed in Deep Security Manager, under Events & Reports > Integrity Monitoring Events. Event tagging can help you to sort events and determine which ones are legitimate and which ones need to be investigated further.
You can manually apply tags to events by right-clicking the event and then clicking Add Tag(s). You can choose to apply the tag to only the selected event or to any similar Integrity Monitoring events.
You can also use the auto-tagging feature to group and label multiple events. To configure this feature in the Deep Security Manager, go to Events and Reports > Integrity Monitoring Events > Auto-Tagging > New Trusted Source. There are three sources that you can use to perform the tagging:
- A Local Trusted Computer.
- The Trend Micro Certified Safe Software Service.
- A Trusted Common Baseline, which is a set of file states collected from a group of computers.
For more information on event tagging, see Apply tags to identify and group events.