Deep Security 10.3 has reached end of support. Use the version selector (above) to see more recent versions of the Help Center.
Bake the agent into your AMI or WorkSpace bundle
If you want to deploy the Deep Security Agent on multiple Amazon EC2 instances, you can 'bake' the Deep Security Agent into an Amazon Machine Instance (AMI). 'Baking the agent' is the process of launching an EC2 instance based on a public AMI, installing the agent on it, and then saving this custom EC2 image as an AMI. This AMI (with the agent 'baked in') can then be selected when launching new Amazon EC2 instances.
Similarly, if you want to deploy the Deep Security Agent on multiple Amazon WorkSpaces, you can create a custom 'WorkSpace bundle' that includes the agent. The custom bundle can then be selected when launching new Amazon WorkSpaces.
The following instructions step you through the process of baking an AMI and creating a custom WorkSpace bundle with a pre-installed and pre-activated agent.
- Before you begin
- Step 1. Configure the activation type
- Step 2. Launch a 'master' Amazon EC2 instance or Amazon WorkSpace
- Step 3. Install and activate an agent on the master
- Step 4. Verify that the agent was installed and activated properly
- Step 5. (Optional) Set up policy auto-assignment
- Step 6. Create an AMI or custom WorkSpace bundle based on the master
- Step 7. Use the AMI
Before you begin
Add AWS cloud accounts to Deep Security Manager. These are the AWS accounts that contain, or will contain, the Amazon EC2 instances and Amazon WorkSpaces where you want to install the Deep Security Agent.
After adding your AWS accounts, your existing Amazon EC2 instances and Amazon WorkSpaces appear in Deep Security Manager. If no agent is installed on them, they appear with a Status of Unmanaged (Unknown) and a grey dot next to them.
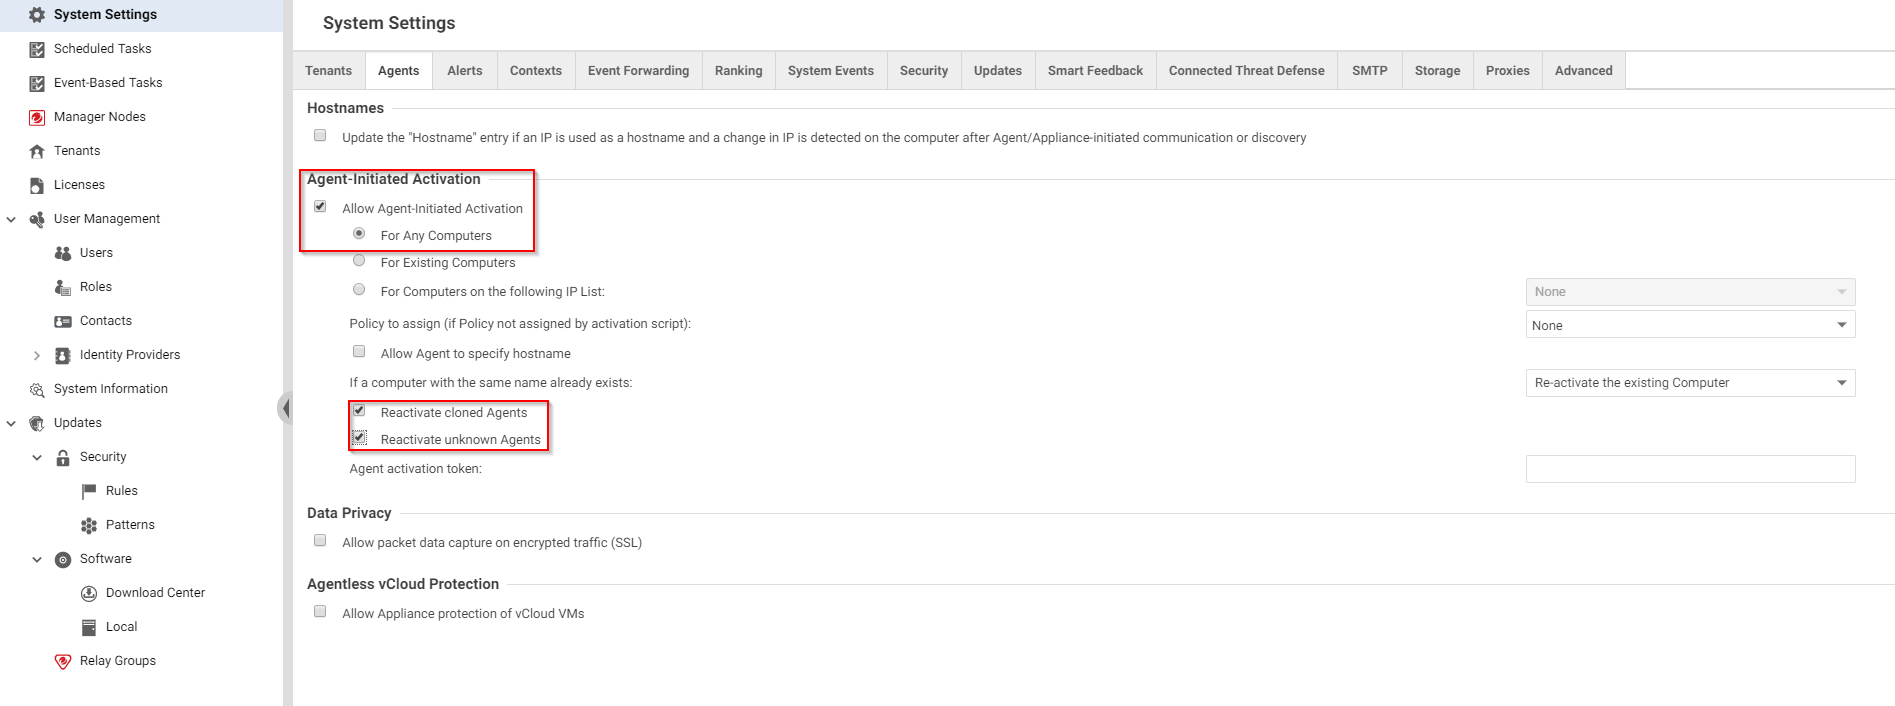
Step 1. Configure the activation type
- Log in to Deep Security Manager.
- Click Administration at the top.
- On the left, click System Settings.
- In the main pane, make sure the Agents tab is selected.
- SelectAllow Agent-Initiated Activation.
- Also select Reactivate cloned Agents and Enable Reactivate unknown Agents. See Agent settings for more information.
- Click Save.
Step 2. Launch a 'master' Amazon EC2 instance or Amazon WorkSpace
- In AWS, launch an Amazon EC2 instance or Amazon WorkSpace. See the Amazon EC2 documentation and Amazon WorkSpaces documentation for details.
- Call the instance 'master'. The master instance is the basis for the EC2 AMI or WorkSpace bundle that you will create later.
Step 3. Install and activate an agent on the master
To install and activate the agent on the master:
- you can install the agent using any method
- you must activate the agent starting on the EC2 instance or Amazon WorkSpace (manager-initiated activation is not recommended for EC2, and not supported for WorkSpaces)
With those points in mind, here are two installation and activation methods that work with Amazon EC2 instances and Amazon WorkSpaces:
- Option 1: Use a deployment script
Run a deployment script on the Amazon EC2 instance or Amazon WorkSpace. The script installs and activates the agent and then assigns a policy.
See Use deployment scripts to add and protect computers for details.
OR - Option 2: Install and activate manually
- Get the Deep Security Agent software, copy it to the Amazon EC2 instance or Amazon WorkSpace, and then install it. For details, see Get Deep Security Agent software, and Manually install the Deep Security Agent.
- Run the activation command on the agent.
dsa_control -a dsm://<dsm_host_or_IP>:<port>/ where:
<dsm_host_or_IP> is replaced with the Deep Security Manager hostname or IP address, and
<port> is replaced with the Deep Security Manager heartbeat port, which is 4120, by default.
For details on this command, see Command-line basics.
You have now installed and activated Deep Security Agent on the master Amazon EC2 instance or Amazon WorkSpace. If you ran a deployment script, a policy was assigned to the agent during activation. If you completed a manual installation and activation, then no policy was assigned to the agent.
Step 4. Verify that the agent was installed and activated properly
- Log in to Deep Security Manager.
- Click Computers at the top.
- On the navigation pane on the left, make sure your master Amazon EC2 instance or Amazon WorkSpace appears under Computers > your_AWS_account > your_region .
- In the main pane, make sure that the master Amazon EC2 instance or Amazon WorkSpace appears with a Status of Managed (Online) and a green dot next to it.
Step 5. (Optional) Set up policy auto-assignment
If you manually installed and activated the agent on the master, no policy was assigned to the agent. Assigning a policy is highly recommended; if you don't do this, you'll have to assign individual protection modules directly to the Amazon EC2 instance or Amazon WorkSpace.
If you want to assign a policy to the master, as well as auto-assign a policy to future EC2 instances and WorkSpaces that are launched using the master, follow these instructions:
- In Deep Security Manager, create an event-based task with these parameters:
- Set the Event to Agent-Initiated Activation.
- Set Assign Policy to the policy you want to assign.
- (Optional) Set a condition to Cloud Instance Metadata, with
- a tagKey of EC2 and a tagValue.* of True (for an EC2 instance)
OR - a tagKey of WorkSpaces and a tagValue.* of True (for a WorkSpaces)
The above event-based task says:
When an agent is activated, assign the specified policy, on condition that EC2=true or WorkSpaces=true exists in the Amazon EC2 instance or WorkSpace.
If that key/value pair does not exist in the EC2 instance or WorkSpace, then the policy is not assigned (but the agent is still activated). If you do not specify a condition, then the policy is assigned on activation unconditionally.
For details on creating event-based tasks, see Automatically assign policies by AWS instance tags. - a tagKey of EC2 and a tagValue.* of True (for an EC2 instance)
- If you added a key/value pair in Deep Security Manager in the previous step, do the following:
- Go to AWS.
- Find your master EC2 instance or WorkSpace.
- Add tags to the master with a Key of EC2 or WorkSpaces and a Value of True.
For details, see this Amazon EC2 documentation on tagging, and this Amazon WorkSpace documentation on tagging.
You have now set up policy auto-assignment. New Amazon EC2 instances and Amazon WorkSpaces that are launched using the master are activated automatically (since the agent is pre-activated on the master), and then auto-assigned a policy through the event-based task.
- On the master EC2 instance or WorkSpace, re-run the activation command to assign it a policy:
dsa_control -a dsm://<dsm_host_or_IP>:<port>/ where:
<dsm_host_or_IP> is replaced with the manager's hostname or IP address, and
<port> is replaced with the manager's heartbeat port, which is 4120, by default.
For details on this command, see Command-line basics.
The re-activation causes the event-based task to assign the policy to the master. The master is now protected.
You are now ready to bake your AMI or create a custom WorkSpace bundle.
Step 6. Create an AMI or custom WorkSpace bundle based on the master
- To create an AMI on Linux, see this Amazon documentation.
- To create an AMI on Windows, see this Amazon documentation.
- To create a custom WorkSpace bundle, see this Amazon documentation.
You now have an AMI or WorkSpace bundle that includes a pre-installed and pre-activated agent.
Step 7. Use the AMI
Now that you have a custom AMI or WorkSpace bundle, you can use it as the basis for future Amazon EC2 instances and Amazon WorkSpaces. With the custom AMI or bundle, Deep Security Agent starts up automatically, activates itself, and applies the protection policy assigned to it.