Deep Security 10.2 has reached end of support. Use the version selector (above) to see more recent versions of the Help Center.
Deploy the Deep Security Virtual Appliance with NSX Advanced or Enterprise
If you want agentless protection for your VMware images when you deploy deep security, you must download the Deep Security Virtual Appliance onto Deep Security Manager and then install the appliance as a service on each of your ESXi servers. You can also update the appliance to protect against new OS vulnerabilities.
To deploy the appliance, import it into the manager then deploy it using vSphere. See Import appliance packages into Deep Security Manager and Deploy the appliance and NSX services via vSphere.
The virtual appliances run an image of the CentOS operating system. When you deploy the appliance, a version of Deep Security Agent is deployed on the appliance to protect the CentOS operating system. When updates become available, you can update the appliance software, as well as the agent that protects its operating system. See Update Deep Security software
Import appliance packages into Deep Security Manager
Download the Deep Security Virtual appliance and import it into Deep Security Manager.
You can import multiple versions of the appliance. When deploying, the latest version is used.
When you import the appliance, Deep Security Manager automatically downloads Deep Security Agent software that is compatible with the operating system of the appliance's virtual machine. When you deploy the appliance, the agent software is also deployed on the operating system of the appliance's virtual machine.
- On your management computer, go to the Trend Micro Download Center (http://downloadcenter.trendmicro.com).
-
Download the latest Deep Security Virtual Appliance package to your computer.
- On Deep Security Manager, go to Administration > Updates > Software > Local.
-
Click Import and upload the package to Deep Security Manager.
- Optionally, for guest VMs that run Microsoft Windows, you can also download the Deep Security Notifier. The notifier is a component that displays messages for Deep Security system events in the system tray.
Deploy the appliance and NSX services via vSphere
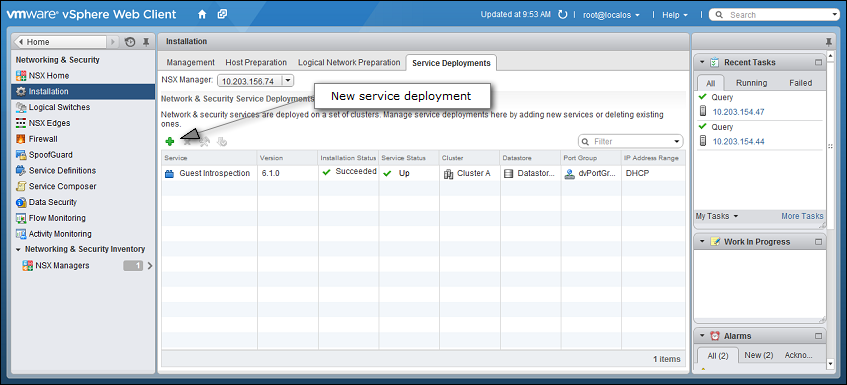
- In the vSphere Web Client, go to Home > Networking and Security > Installation > Service Deployments.
- Click the green plus sign (
 ).
).
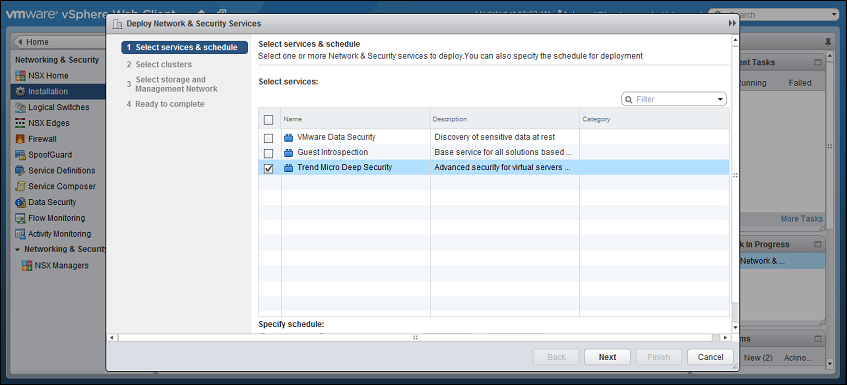
- On the new window that appears, select the Trend Micro Deep Security service and then click Next.
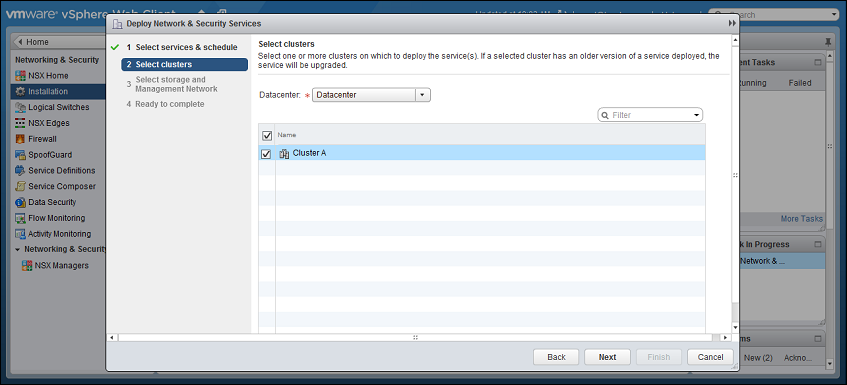
- Select the ESXi cluster(s) where you want to deploy the "Trend Micro Deep Security" service and then click Next.
-
For each cluster, select:
- a datastore where you want to store the Deep Security Virtual Appliance
- a distributed virtual port group (dvSwitch) where the appliance will be attached to the vNetwork
- how you want to assign an IP address to the appliance, such as DHCP or manually.
Click Next.
In IP assignment, if you select static IP pools for the Deep Security service or Guest Introspection service, verify that your default gateway and DNS is reachable, and that the prefix length is correct. The Deep Security Virtual Appliance and Guest Introspection service VMs' IP addresses aren't on the same subnet as Deep Security Manager and NSX Manager, so if the gateway is incorrect, the appliances won't be able to activate, and they won't be able to communicate with their managers.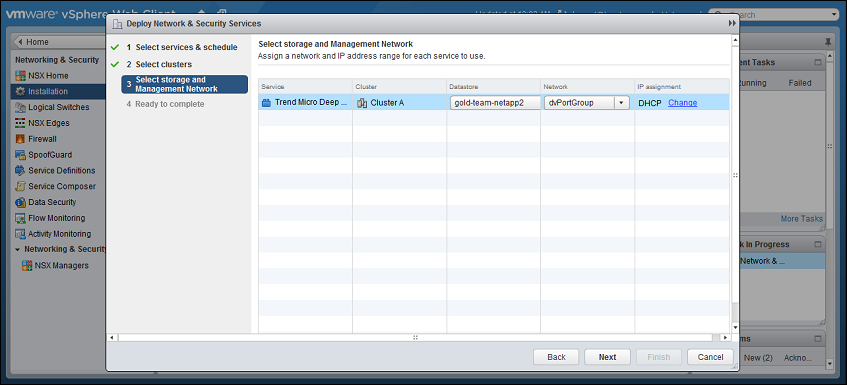
-
Click Finish.
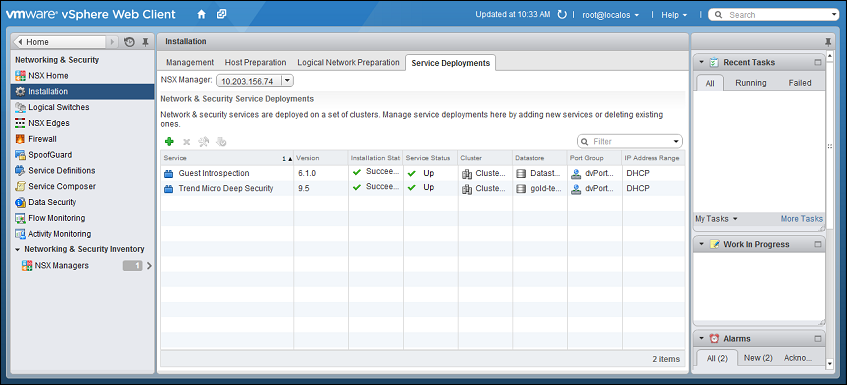
When deployment is complete, the Trend Micro Deep Security service will appear in the list of network and security service deployments on the cluster.