Deep Security 10.1 has reached end of support. Use the version selector (above) to see more recent versions of the Help Center.
Enhanced anti-malware and ransomware scanning with behavior monitoring
Deep Security provides security settings that you can apply to Windows machines that are protected by a Deep Security Agent to enhance your malware and ransomware detection and clean rate. These settings enable you to go beyond malware pattern matching and identify suspicious files that could potentially contain emerging malware that hasn’t yet been added to the anti-malware patterns (known as a zero-day attack).
In this article:
- How does enhanced scanning protect you?
- How to enable enhanced scanning
- What happens when enhanced scanning finds a problem?
- What if my agents can't connect to the Internet directly?
How does enhanced scanning protect you?
Threat detection: To avoid detection, some types of malware attempt to modify system files or files related to known installed software. These types of changes often go unnoticed because the malware takes the place of legitimate files. Deep Security can monitor system files and installed software for unauthorized changes to detect and prevent these changes from occurring.
Anti-exploit: Malware writers can use malicious code to hook in to user mode processes in order to gain privileged access to trusted processes and to hide the malicious activity. Malware writers inject code into user processes through DLL injection, which calls an API with escalated privilege. They can also trigger an attack on a software exploit by feeding a malicious payload to trigger code execution in memory. In Deep Security, the anti-exploit functionality monitors for processes that may be performing actions that are not typically performed by a given process. Using a number of mechanisms, including Data Execution Prevention (DEP), Structured Exception Handling Overwrite Protection (SEHOP), and heap spray prevention, Deep Security can determine whether a process has been compromised and then terminate the process to prevent further infection.
Extended ransomware protection: Recently, ransomware has become more sophisticated and targeted. Most organizations have a security policy that includes anti-malware protection on their endpoints, which offers a level of protection against known ransomware variants; however, it may not be sufficient to detect and prevent an outbreak for new variants. The ransomware protection offered by Deep Security can protect documents against unauthorized encryption or modification. Deep Security has also incorporated a data recovery engine that can optionally create copies of files being encrypted to offer users an added chance of recovering files that may have been encrypted by a ransomware process.
How to enable enhanced scanning
Enhanced scanning is configured as part of the anti-malware settings that are applied to a policy or individual computer. For general information on configuring anti-malware protection, see Protect servers from malware in four steps.
These settings can only be applied to Windows machines that are protected by a Deep Security Agent.
The first step is to enable enhanced scanning in a real-time malware scan configuration:
- In Deep Security Manager, go to Policies > Common Objects > Other > Malware Scan Configurations.
- Double-click an existing real-time scan configuration to edit it (for details on malware scan configurations, see Malware Scan Configurations).
- On the General tab, select these options:
- Detect suspicious activity and unauthorized changes (incl. ransomware): Enables the threat detection, anti-exploit, and ransomware detection features that are described above.
- Back up and restore ransomware-encrypted files: When this option is selected, Deep Security will create backup copies of files that are being encrypted, in case they are being encrypted by a ransomware process.
- Click OK.
By default, real-time scans are set to scan all directories. If you change the scan settings to scan a directory list, the enhanced scanning may not work as expected. For example, if you set Directories to scan to scan "Folder1" and ransomware occurs in Folder1, it may not be detected if the encryption associated with the ransomware happens to files outside of Folder1.
Next, apply the malware scan configuration to a policy or an individual computer:
- In the Computer or Policy editor
 You can change these settings for a policy or for a specific computer.
To change the settings for a policy, go to the Polices page and double-click the policy that you want to edit (or select the policy and click Details).
To change the settings for a computer, go to the Computers page and double-click the computer that you want to edit (or select the computer and click Details)., go to Anti-Malware > General.
 - Ensure that the Anti-Malware State is On or Inherited (On).
- The General tab contains sections for Real-Time Scan, Manual Scan, and Scheduled Scan. In the appropriate sections, use the Malware Scan Configuration list to select the scan configuration that you created above.
- Click Save.
What happens when enhanced scanning finds a problem?
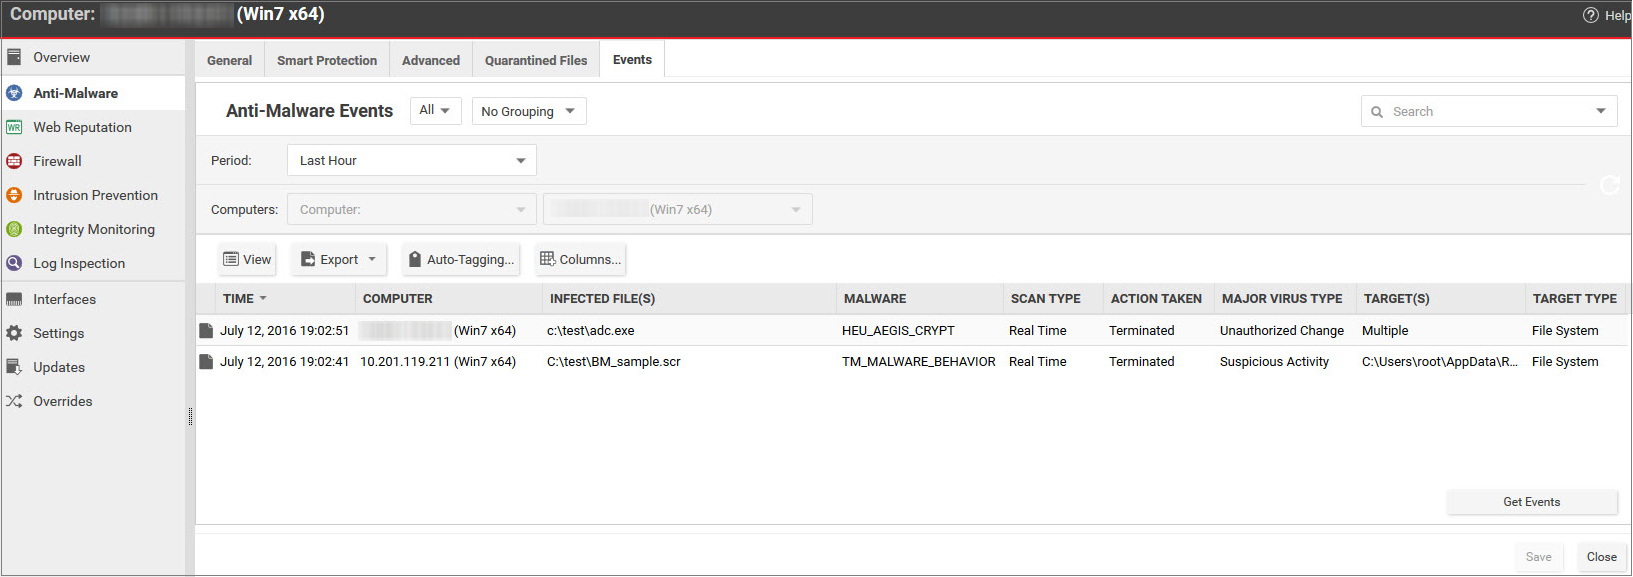
When Deep Security discovers activity or files that match the enhanced scan settings you have enabled, it will log an event (go to Events & Reports > Events > Anti-Malware Events to see a list of events). The event will be identified as “Suspicious activity” or “Unauthorized change” in the Major Virus Type column and details will be displayed in the Target(s) and TargetType columns.
Deep Security performs many types of checks related to the enhanced scan settings, and the actions that it takes depend on the type of check that finds an issue. Deep Security may “Deny Access”, “Terminate”, or “Clean” a suspicious object. These actions are determined by Deep Security and are not configurable, with the exception of the “Clean” action:
- Deny Access: When Deep Security detects an attempt to open or execute a suspicious file, it immediately blocks the operation and records an anti-malware event.
- Terminate: Deep Security terminates the process that performed the suspicious operation and records an anti-malware event.
- Clean: Deep Security checks the Malware Scan Configuration and performs the action specified for Trojans on the Actions tab. One or more additional events will be generated relating to the action performed on the Trojan files.

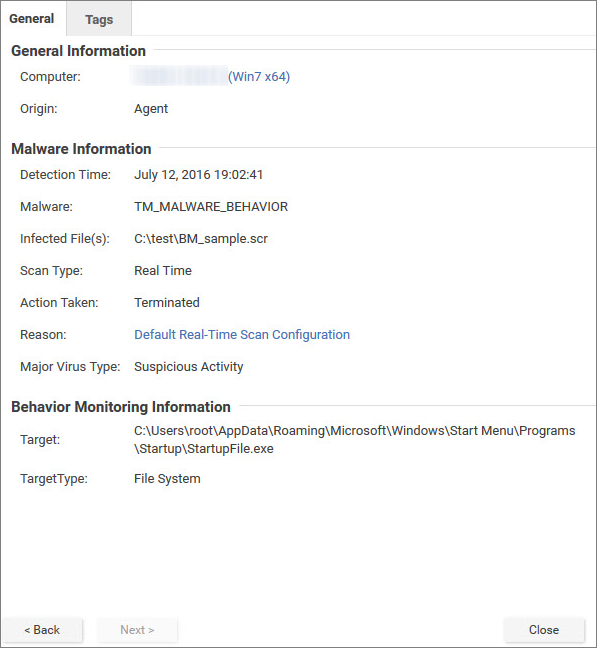
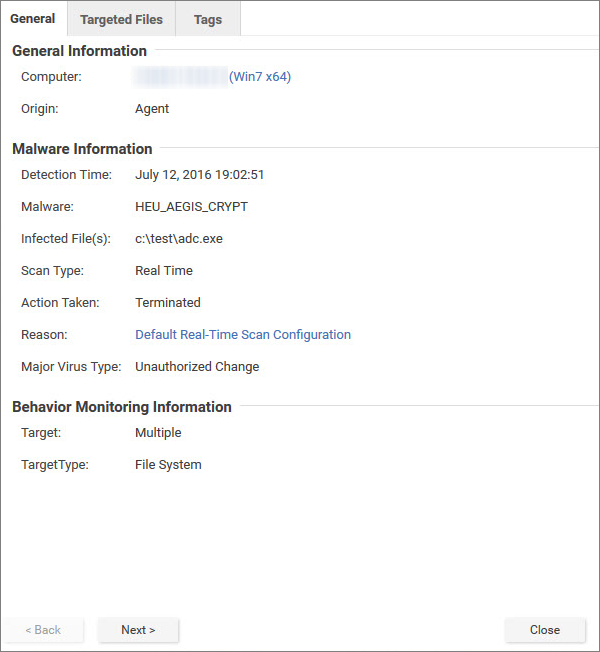
Double-click an event to see details:

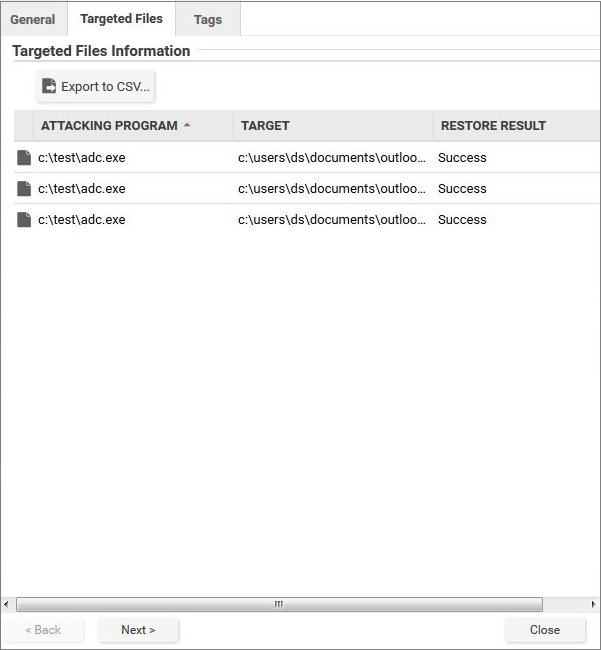
Events related to ransomware have an additional Targeted Files tab:


If you investigate and find that an identified file is not harmful, you can right-click the event and click Allow to add the file to a scan exclusion list for the computer or policy. You can check the scan exclusion list in the policy or computer editor, under Anti-Malware > Advanced > Behavior Monitoring Protection Exceptions.
What if my agents can't connect to the Internet directly?
The enhanced scanning features described in this article require internet access to check files against the Global Census Server and Good File Reputation Service. If your Deep Security Agents cannot access the internet directly, you will need to configure a proxy to enable agents to check those sites.
If the agent cannot check the Global Census Server and Good File Reputation Service, the detection rate for scans will be very low. For example, ransomware will not be detected and process memory scanning will also be affected.
You can configure the proxy settings in a policy or for individual computers:
- In the policy or computer editor, go to Settings > General. The settings are in the Census and Good File Reputation Service section.
- If the Inherited checkbox is selected, the proxy settings are inherited from the parent policy. To change the settings for this policy or computer, clear the checkbox.
- Ensure that the When accessing Global Server, use proxy checkbox is selected and in the list, select New. A dialog box appears, where you can configure the proxy settings.
Be careful when configuring the proxy settings because Deep Security does not perform a check to make sure they are valid. If you have configured Smart Protection Server proxy settings in the computer or policy editor, under Anti-Malware > Smart Protection > Smart Protection Server for File Reputation Service, you may want to use the same settings here.